Phone Photography for Painters: How to Capture Your Own Killer Reference Images
 Kerri Dixon
Learn how to capture stunning reference photos with your phone—no fancy gear needed. Simple tips for better composition, lighting, and detail
Phone Photography for Painters: How to Capture Your Own Killer Reference Images
Two weeks after my Australia Zoo art retreat and I’m still buzzing. The biggest win? Watching everyone level up their reference photo game. When you’ve nailed the pastel techniques and want your work to feel more you, shooting your own references is the next step forward. No copyright drama, heaps more creative control, and images that match how you actually see the world.
Here’s the streamlined version of everything we covered—plus extra tips I picked up on our Hervey Bay photo walk with Matt (phone-only shooter and absolute wizard).
The mindset shift: you’re not taking “happy snaps”
You don’t need to be Nat Geo. You do need to be intentional. Slow down. Think like a painter:
- What’s the subject doing?
- Where’s the light?
- What background will make this sing?
- Can I see fur/feather direction, eyes, and shadow shapes clearly?
Plan the painting while you’re framing the photo. Grab a couple of wider shots for options, then tighter ones for detail. Jot quick thumbnail sketches or notes if an idea sparks—future-you will thank you.
“I talk more about organising your creative time here…”
Gear reality check
- Phones are awesome now. They’re light, always with you, and macro on newer models is wild.
- DSLR/mirrorless wins for long zoom + low light, but you don’t need to lug it everywhere.
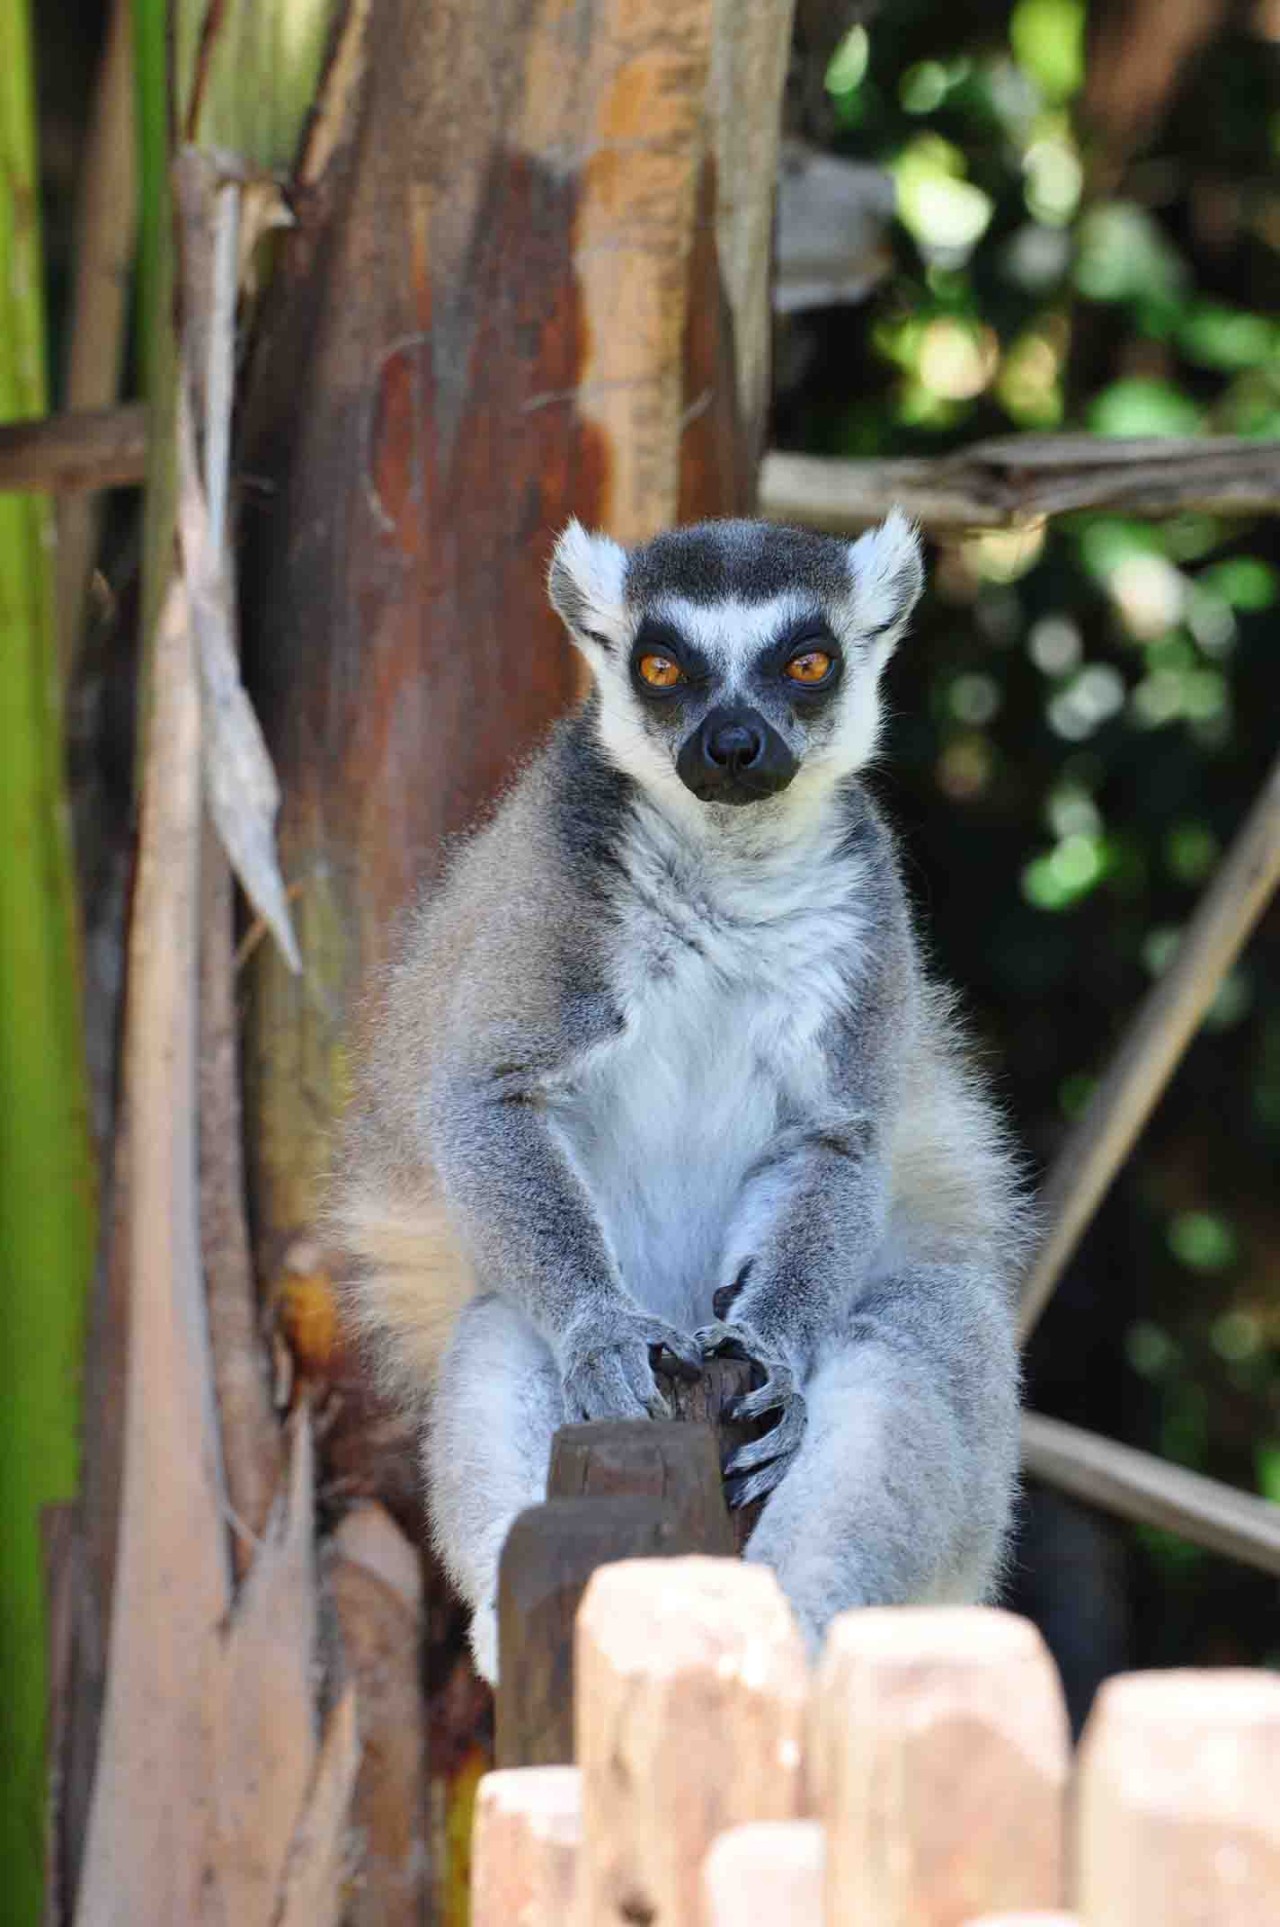
- If your phone is older and the zoom turns to porridge, switch subjects: choose animals closer to the glass/fence (frogs, lizards, birds on feeders, crocs, lemurs, meerkats), or go for textures, plants, and macro studies. Adapt the plan instead of forcing a bad shot.
When to shoot wildlife (zoo or park)
Animals nap in the heat. Aim for early morning or late arvo (3–5pm) when they’re active and crowds thin. If you’re in nature, sit still and let them forget you exist—natural behavior beats “alert and staring” every time.
Phone-first tips that change everything
- Tap & hold to focus on the eyes to lock focus and exposure.
- Clean the lens (yep, that smudge is why it looks soft).
- Turn on gridlines for effortless Rule of Thirds.
- Zoom with your feet instead of digital zoom to avoid mushy pixels.
- Use burst mode for moving subjects.
- Hold steady with two hands or brace on a post/railing.
- Shoot in RAW if your phone allows—way more editing latitude later.
Level-up angles & formats
- Flip your phone upside down for a fresh perspective (especially low angles).
- Bring a foreground element (leaf/rock/railing) to create depth.
- Switch to 16:9 so you can see the whole frame on-screen.
- Learn your settings—five minutes of tinkering pays off forever.
Macro & “waterline” experiments
- Macro: get low, get close, and keep very still; a mini tripod helps.
- Underwater half-and-half shots: if your phone’s waterproof, dunk the camera end only, use voice command to trigger the shutter (no tapping), and avoid submerging the charging port—especially in salt water.
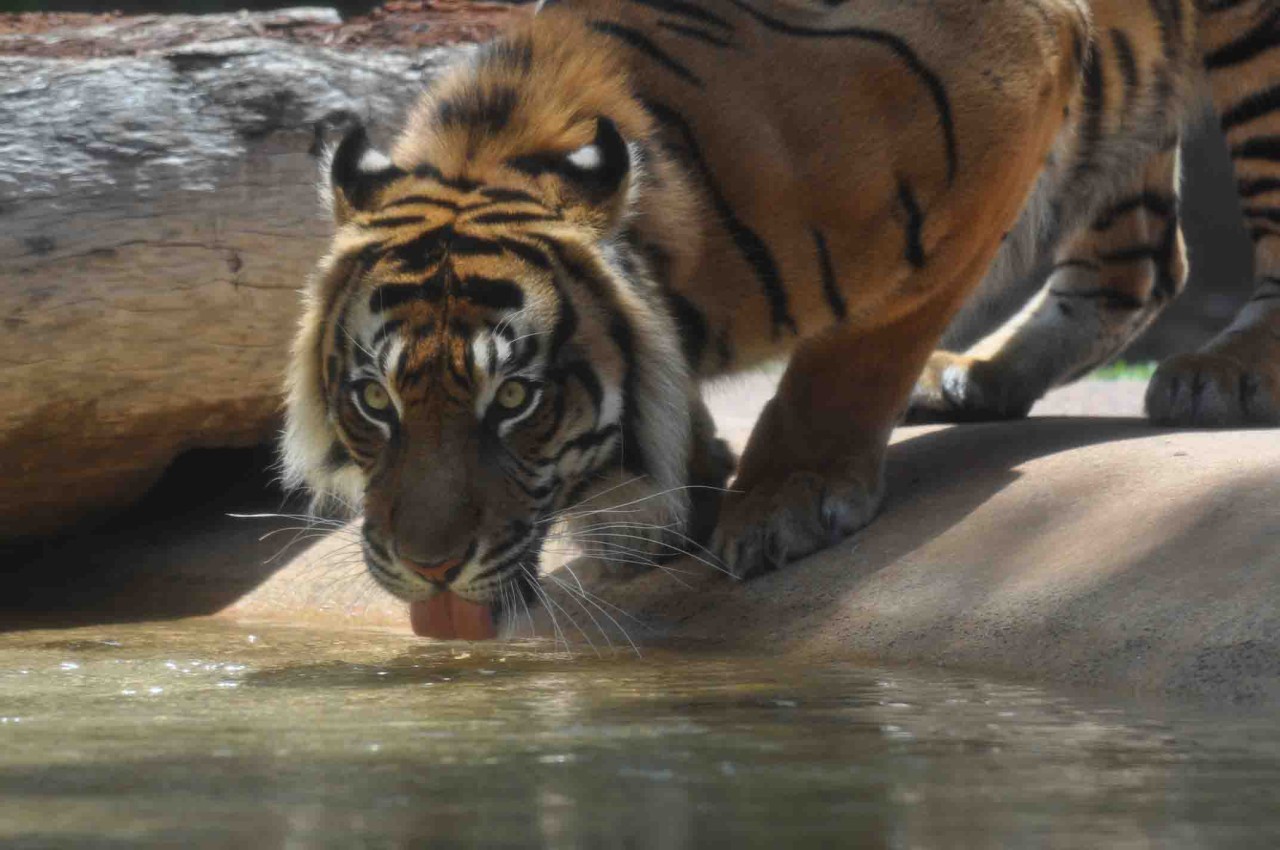
(Bonus: Video works too. Film the tiger walking, then scrub to the perfect frame and export a still.)
Composition on the fly (realist edition)
- Think subject + story: what gesture or moment tells it best?
- Shoot series: wide (context), mid (composition), tight (detail). You’ll mix-and-match when you paint.
- Watch backgrounds. Step left/right, crouch, or raise the camera to lose distractions and line up clean shapes.
- Look for leading lines (fences, branches) that point to the subject.
- Threes are pleasing: three leaves, three lemurs—odd numbers often feel balanced.
Edit just enough (for painters, not influencers)
You’re optimizing a painting reference, not chasing filters:
- Crop, straighten, and nudge exposure/contrast/white balance.
- Use Snapseed (free, has a handy healing tool) or Lightroom (free tier is solid).
- If you want full manual camera vibes on iPhone, try Reeflex for DSLR-style controls.
Quick shooting checklists
Wildlife/zoos
- Early or late light; fewer people.
- Glass? Shoot square-on to reduce reflections; shade the lens with your hand.
- Take multiples: head turn, eyes open, weight shift, paw placement.
- Grab a detail shot of the eye and a texture shot (fur/feathers/rock/foliage) for later.
Macro/nature studies
- Kill the wobble: two hands or mini tripod.
- Focus where the story detail is (insects’ eyes, flower stamens, bark texture).
If you only remember five things
- Tap to focus on the eyes.
- Move your body, not the digital zoom.
- Shoot bursts/video for movement.
- Think composition as if you’re already painting.
- RAW if you can; edit lightly later.
Want to practice right now?
Head to a local botanic garden or park this week and test out some of these tips and remember to take your time and take heaps of photos, your sure to get a winner.
and If you want to feel more confident sharing your progress shots, read my review of Show Your Work…by Austin Kleon
Kerri xx